Thursday, March 7, 2013

Gotta catch 'em all: Last-chance exception handling in .NET with WinForms

Recently, I went through the exercise of hooking up a crash-reporting component to a large .NET application using Windows Forms.  The goal, of course, is to catch all unhandled exceptions so they can be reported to the developer.

Throughout this post I'll be referring to this Program.cs. The code we incrementally un-commented for each of the examples. I'll also link to compiled example executables. If you don't trust my binaries, you can compile them yourself.


0.  No exception handling

First we see an application that throws exceptions in the UI thread and a background thread, with no handling. Try out 0_Nothing.exe.
With no exception handling, background thread exceptions crash hard. UI thread exceptions are handled by the built-in .NET WinForms handler:


This has a Continue option which allows the user to ignore the exception and go on. This method is absolutely unacceptable. No exceptions should ever be allowed to be ignored, as the program is in an indeterminate state.


1.  try / catch

The naive approach would be to set up a try/catch block in Main() around the Application.Run() call. See 1_TryCatch.exe.
try {
   Application.Run(new Form1());
}
catch (Exception ex) {
   // ...
}
We see here that there is no difference between this and the version with no try/catch. This is because the UI thread exceptions are still being handled inside of Application.Run() by the default handler. The try/catch is never used, and background thread exceptions are unaffected.


2.  Application.ThreadException

Next, we utilize WinForms' Application.ThreadException event to handle UI thread exceptions. See 2_Application_ThreadException.exe.
Application.ThreadException += (sender, args) =>
   HandleException("Application.ThreadException", args.Exception);
Here, we see that instead of the unacceptable WinForms handler, our handler was called (for UI thread exceptions). However, as MSDN points out (emphasis mine):
This event allows your Windows Forms application to handle otherwise unhandled exceptions that occur in Windows Forms threads.
...
To catch exceptions that occur in threads not created and owned by Windows Forms, use the UnhandledException event handler.
So background thread exceptions still crash hard in this example.


3.  AppDomain.UnhandledException

Now we follow the documentation and hook up the AppDomain.UnhandledException handler. See 3_AppDomain_UnhandledException_NoUhandledMode.exe.
AppDomain.CurrentDomain.UnhandledException += (sender, args) =>
   HandleException("AppDomain.UnhandledException", (Exception)args.ExceptionObject);
Now finally, we are able to catch exceptions on background threads with this handler. UI thread exceptions, however, are still handled by our Application.ThreadException handler.


4.  Application.SetUnhandledExceptionMode

As mentioned in the MSDN documentation, a call to Application.SetUnhandledExceptionMode and passing UnhandledExceptionMode.ThrowException tells Winforms to not use the Application.ThreadException handler. Instead, it lets exceptions bubble out of Application.Run. See this in 4_Everything.exe.
Application.SetUnhandledExceptionMode(UnhandledExceptionMode.ThrowException);
The result is that the try/catch around Application.Run actually works now: UI thread exceptions are now caught by that handler.


5.  No more try / catch

Finally, removing the try/catch around Application.Run allows for all unhandled exceptions to be handled via AppDomain.UnhandledException. See 5_Final.exe. This is how we ended up handling everything in our application; we found it ideal to have one route for all[1] unhandled exceptions.


Summary

It is important to note that all exceptions are handled on the thread that they occurred on. If you're in the same boat I was in, you're stuck with a third-party crash handler component that had to be run on the UI thread. Because of this, I marshal the calls to the UI thread with a call to Control.Invoke(), as usual for cross-thread UI stuff.

[1] - In fact it gets even more complicated. There are certain scenarios where exceptions that need to cross Kernel or COM boundaries can be swallowed. For example, the Form.OnLoad method is actually a user-mode kernel callback. These are notorious for swallowing exceptions. In cases where we are sufficiently suspect of exceptions, we set up a try/catch and manually hand off the exception to the common handler.

The full source code for my example binaries can be downloaded here.

Monday, February 25, 2013

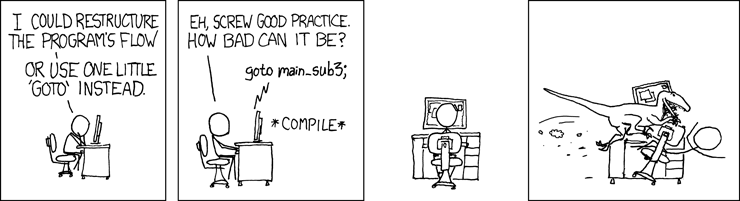
goto: The Forbidden Fruit


Nowdays, it's not hard to find tons of arguments against the use of goto in C (and C-like languages).  Post anything to StackOverflow, about/including goto and you're almost guaranteed to get flamed.


Just like many good and useful things in our lives (pocketknives, guns, kegs, etc.) it only takes a few people to abuse something before everyone else categorizes it as "bad".  But the truth is, goto is a simple tool that, when used correctly, can make a program much easier to write (and even understand!)

First, let's take a look at how *not* to use goto (this is just a little example, nothing meaningful):

int foo(int a)
{

   int bar;
   while (bar < spam())
   {
loop:
      bar = a * scale;
      if (bar > 100) goto toobig;
      bla(bar);
   }
   return bar;
toobig:
   if (bar-tar > 0)
      return bar;
   bar -= 5; goto loop;


   return bar * 2;
}


Wow, that was even hard to come up with, and cetrainly isn't the way to do things. Jumping in and out of control structures is bound to confuse the next guy, and possibly the compiler when it is trying to optimize.

But in the right places, goto can be extremely useful. Luckily, my opinion here is not alone. In fact, the Linux Kernel (3.8) uses goto over 100,000 times!
$ find linux-3.8 -iname '*.c' -exec grep 'goto' {} \; | wc -l
104299
Here is a good example of this programming style in use, from the ext4 driver.


First, let's look at some bad code. The author does two things that I really dislike: 1) They return all over the place. This is okay, unless (like in this example) you have to deal with resource de-allocation. Here, this leads to a fragile situation with lots of calls to free. 2) They check first for success, which leads to ridiculous amounts of nesting.
bool baz() {
   bool result = false;
   uint8_t *buf1 = NULL;
   uint8_t *buf2 = NULL;
   uint8_t *buf3 = NULL;

   // Allocate buffers.
   buf1 = malloc(BUF1_SIZE);
   if (buf1) {

      buf2 = malloc(BUF2_SIZE);
      if (buf2) {

         buf3 = malloc(BUF3_SIZE);
         if (buf3) {

            result = use_buffers(buf1, buf2, buf3);
            if (result)
               printf("Success!\n");
            else
               fprintf(stderr, "Operation failed.\n");
            free(buf3);
            free(buf2);
            free(buf1);
            return result;

         }
         else {
            fprintf(stderr, "Error allocating %d bytes.\n", BUF3_SIZE);
            free(buf2);
            free(buf1);
            return false;
         }
      }
      else {
         fprintf(stderr, "Error allocating %d bytes.\n", BUF2_SIZE);
         free(buf1);
         return false;
      }
   }
   else {
      fprintf(stderr, "Error allocating %d bytes.\n", BUF1_SIZE);
      return false;
   }
}


Using goto and a single exit point clean this mess up very nicely:
bool baz() {
   bool result = false;    // Assume failure until proven successful
   uint8_t *buf1 = NULL;
   uint8_t *buf2 = NULL;
   uint8_t *buf3 = NULL;

   // Allocate buffers.
   buf1 = malloc(BUF1_SIZE);
   if (!buf1) {
      fprintf(stderr, "Error allocating %d bytes.\n", BUF1_SIZE);
      goto exit;
   }

   buf2 = malloc(BUF2_SIZE);
   if (!buf2) {
      fprintf(stderr, "Error allocating %d bytes.\n", BUF2_SIZE);
      goto exit;
   }

   buf3 = malloc(BUF3_SIZE);
   if (!buf3) {
      fprintf(stderr, "Error allocating %d bytes.\n", BUF3_SIZE);
      goto exit;
   }

   // Do something useful
   if (!use_buffers(buf1, buf2, buf3)) {
      fprintf(stderr, "Operation failed.\n");
      goto exit;
   }

   result = true;
   printf("Success!\n");

exit:
   if (buf1) free(buf1);
   if (buf2) free(buf2);
   if (buf3) free(buf3);

   return result;
}

This allows for a very straight-forward approach to handling resource allocation/freeing and a clean exit path. It's much easier to maintain as well (imagine having to remove buf2 in the first example!)

An alternative to goto I often see is the dummy do-while loop:
bool baz() {
   bool result = false;
   uint8_t *buf1 = NULL;
   uint8_t *buf2 = NULL;
   uint8_t *buf3 = NULL;

   do {
      // Allocate buffers.
      buf1 = malloc(BUF1_SIZE);
      if (!buf1) {
         fprintf(stderr, "Error allocating %d bytes.\n", BUF1_SIZE);
         break;
      }
   
      buf2 = malloc(BUF2_SIZE);
      if (!buf2) {
         fprintf(stderr, "Error allocating %d bytes.\n", BUF2_SIZE);
         break;
      }
   
      buf3 = malloc(BUF3_SIZE);
      if (!buf3) {
         fprintf(stderr, "Error allocating %d bytes.\n", BUF3_SIZE);
         break;
      }
   
      // Do something useful
      if (!use_buffers(buf1, buf2, buf3)) {
         fprintf(stderr, "Operation failed.\n");
         break;
      }
   
      result = true;
      printf("Success!\n");
   } while(0);

   if (buf1) free(buf1);
   if (buf2) free(buf2);
   if (buf3) free(buf3);

   return result;
}

This isn't terrible, but what about when you want to use an actual loop inside that dummy do-while, and break out of it? PHP includes a nice disgusting feature to break out of multiple levels. In other languages you're screwed, unless you follow the loop with some additional code to check for completion of the loop:

bool baz() {
   bool result = false;
   uint8_t *buf1 = NULL;
   uint8_t *buf2 = NULL;
   int i;

   do {
      // Allocate buffers.
      buf1 = malloc(BUF1_SIZE);
      if (!buf1) {
         fprintf(stderr, "Error allocating %d bytes.\n", BUF1_SIZE);
         break;
      }
   
      buf2 = malloc(BUF2_SIZE);
      if (!buf2) {
         fprintf(stderr, "Error allocating %d bytes.\n", BUF2_SIZE);
         break;
      }
   
      // Do something in a loop
      for (i=0; i<CONSTANT; ++i) {
         if (!use_buffers(buf1, buf2)) {
            fprintf(stderr, "Operation #%d failed.\n", i);
            break;            // Can't get out of the do-while from here!
         }
      }

      // Have to add this ridiculous check, because we could have exited
      // the loop early...
      if (i==CONSTANT) {
         result = true;
         printf("Success!\n");
      }
   } while(0);

   if (buf1) free(buf1);
   if (buf2) free(buf2);

   return result;
}
In this case, a goto exit; would have worked just fine.

Sunday, February 24, 2013

Deftones - You've Seen the Butcher - Timing


Maybe the name of this blog should include something about ADD or OCD. Either way, enough time was spent perfecting this, I figure I might as well share it with the Interwebs.

I'm a big fan of Deftones and their 2010 album Diamond Eyes was unsurprisingly awesome.  You've Seen the Butcher is an awesome track.  The timing is subtly complicated, so I decided to chart it out.  Hope this helps someone.

All time signatures are x/4, and the number of beats in each measure are shown.  For many parts of the song, the final measure's number of beats is the same as the part that follows. These are noted.

Intro
     lead-in                      1

Guitar-only               Alt. 3 and 4
     last measure                 5

Heavy riff (no vox)    Alt. 3 and 5
     last measure                 4


Verse 1
Verse                  Alt. 3 and 4
     last measure                 5

Pre-Chorus             Alt. 3 and 5

Chorus                 4
     last measure                 3


Verse 2
Verse                  Alt. 3 and 4
     last measure                 5

Pre-Chorus             Alt. 3 and 5

Chorus                 4


Bridge  note the two 6/4 measures

Heavy riff (no vox)    3  5  3  6  3  5  3  5
                     
Pre-Chorus             3  5  3  6  3  5  3  5


Outro
Chrous                 4
     last measure                 5

Ending                 3  (free)

Thursday, December 13, 2012

Named Pipes between C# and Python

There's a lot of over-complicated information on the internet for communicating between a C# process and a Python process using named pipes on Windows.  I'll start with the code:

C#
// Open the named pipe.
var server = new NamedPipeServerStream("NPtest");

Console.WriteLine("Waiting for connection...");
server.WaitForConnection();

Console.WriteLine("Connected.");
var br = new BinaryReader(server);
var bw = new BinaryWriter(server);

while (true) {
    try {
        var len = (int) br.ReadUInt32();            // Read string length
        var str = new string(br.ReadChars(len));    // Read string

        Console.WriteLine("Read: \"{0}\"", str);

        str = new string(str.Reverse().ToArray());  // Just for fun

        var buf = Encoding.ASCII.GetBytes(str);     // Get ASCII byte array     
        bw.Write((uint) buf.Length);                // Write string length
        bw.Write(buf);                              // Write string
        Console.WriteLine("Wrote: \"{0}\"", str);
    }
    catch (EndOfStreamException) {
        break;                    // When client disconnects
    }
}

Console.WriteLine("Client disconnected.");
server.Close();
server.Dispose();

Python
import time
import struct

f = open(r'\\.\pipe\NPtest', 'r+b', 0)
i = 1

while True:
    s = 'Message[{0}]'.format(i)
    i += 1
        
    f.write(struct.pack('I', len(s)) + s)   # Write str length and str
    f.seek(0)                               # EDIT: This is also necessary
    print 'Wrote:', s

    n = struct.unpack('I', f.read(4))[0]    # Read str length
    s = f.read(n)                           # Read str
    f.seek(0)                               # Important!!!
    print 'Read:', s

    time.sleep(2)
In this example, I implement a very simple protocol, where every "message" is a 4-byte integer (UInt32 in C#, 'I' (un)pack format in Python), which indicates the length of the string that follows. The string is ASCII. Important things to note here:
  • Python
    • The third parameter to open() means "unbuffered". Otherwise, it will default to line-buffered, which means it will wait for a newline character before actually sending it through the pipe.
    • I'm not sure why, but omitting the seek(0) will cause an IOError #0. I was clued to this by a StackOverflow question.
References:

Wednesday, November 14, 2012

Rename SVN Repository

It happens sometimes: You'd like to rename your SVN repository.  Well simply renaming the directory on the server won't do the trick.

Thanks to Miky Dinescu's post, we find that the best way to do this is use svnadmin dump and svnadmin load to export, and import the old repository into a new one, without losing anything.

I wrapped this process up in a nice, foolproof script. Hopefully it makes your life easier.

Saturday, June 9, 2012

Cyanogenmod 9 Nightly!

I am happy to say that I am running Cyanogenmod 9 (nightly, dated 20120608) on my Galaxy Nexus!


I am very happy with it, and have noticed no problems, which is pretty impressive because this is a nightly build, not even a Beta / RC. The CM9 team has done a fantastic job with this version, and stuck very close to the original ICS look and feel.

Things I am happy about:
  • The settings menu. The stock build just seems so crippled to me now, after seeing the CM9 settings. It is too expansive to screenshot, but still quite organized. You can tweak everything from display gamma settings, to the lock screen, to individual volumes, to kernel performance, to (my favorite!) the notification LED.

    Coming from the Incredible, which just had the orange and green notification LED, having an RGB LED that I can play with is great. I have a green blink for texts, slow red for Gmail, and fast light blue for missed calls.
  • The notification drawer. (I couldn't get a screenshot, because the drawer retracts before it is taken.) I really missed these widgets, and now have quick access buttons to toggle Wi-Fi, LTE (So happy about this one!), GPS, Silent/Vibrate/Loud, and Auto-Rotate.  There are other buttons you can add, but these are the ones I wanted.  Also, I tweaked the battery icon.
  • Customizable navigation buttons. I re-ordered the buttons at the bottom (to more closely match my Incredible, actually) and added the search button, which behaves the same way.
  • All of the familar 'root stuff' built right in.  Superuser (of course), Wi-fi tethering, screenshot, etc.
Over I am quite pleased, and will probably keep using this on a day-to-day basis. This is the way Android was meant to be. Can't wait for an RC!

Additional note: Of course, this comes without the Google Apps, so you'll want to download that zip from goo.im/gapps.

Monday, June 4, 2012

Android 4.0.4 OTA update

A couple days ago, I started getting notifications that a system update was ready for install. This was the IMM76K (Android 4.0.4) OTA update that people had been impatiently waiting on for a while.  After making a nandroid backup (via CWM), I decided to give it a try.

The system rebooted, and went to the screen with the android's belly open and the blue spinny thing. Then he was on his back, with the dreaded red triangle.  I wasn't surprised that the OTA update wasn't going to work with my modified phone.

This excellent post on xda-developers gave links to the official OTA updates for the different versions of the G-Nex. So I downloaded the mysid IMM76K from ICL53F update.zip, and adb push'd it to /sdcard. Rebooting into CWM recovery, I tried to install the update, but it failed with:

assert failed: apply_patch_check("/system/app/VZWBackupAssistant.apk".....

I knew why it was failing. I had removed some of the VZW garbage apps that cam pre-installed. Luckily, I didn't actually delete them, I had just renamed them to .apk.REMOVED.  After putting them back1 the update installed successfully.

Another thing to note - I didn't realize it, but the xda post pointed out this important detail: Verizon OTA updates include a script that runs every boot, whose purpose is to restore the recovery image if it is not the expected stock image.  The script is at /system/etc/install-recovery.sh and the recovery image (for flashing) is /system/recovery-from-boot.p.   Thus, if you don't wan't to lose CWM (or other custom recovery), you need to rename these files.

Notes:
1 - I didn't realize it, but ADB is supported in CWM. When I looked in device manager while my phone was connected and in CWM, I saw one device just named "Full".  I manually specified the same Samsung drivers (already installed) from before, and bingo, my phone showed up in adb devices.