Wednesday, November 16, 2016

Windows-Python-PyInstaller GitLab CI Runner

Install Windows Server 2012 R2 "Server Core"

Enable Remote Desktop

Windows 2012 Core Survival Guide – Remote Desktop

Set up runner

  • Create home directory c:\users\gitlab-runner\
  • net user gitlab-runner P@55w0rd
  • icacls c:\users\gitlab-runner gitlab-runner:(CI)(OI)(F)
  • Use secedit to add SeServiceLogonRight to user
  • gitlab-ci-multi-runner install --user .\gitlab-runner --password P@55w0rd
  • wmic useraccount GET Name,FullName,Status,Disabled,PasswordExpires /all
  • wmic useraccount WHERE "Name='gitlab-runner'" SET PasswordExpires=FALSE

Install Python

  • Install 32-bit MSI to C:\Python27_32\ (Yes, add to PATH)
  • Install 64-bit MSI to C:\Python27_64\

Pywin32 and Pypiwin32 (32 and 64)

Install PyInstaller

C:\Python27_32\python.exe setup.py install

Install Git

  • Use git commands in git bash and cmd

Thursday, April 14, 2016

Fun experiences using Wine in Docker (part 2)

After the last post about running Wine in Docker, it was time to try and actually use the image to perform a build.

The first time I tried, the build crashed due to some sort of exception. It turns out the following sequence of events was to blame:

  • NMAKE, running under wine, loads msvcrt80.dll
  • During its DllMain, this DLL calls _wfindfirst64i32(), passing it the path to Microsoft.VC80.CRT.mainfest
  • Internally, _wfindfirst64i32 will:
    • Call FindFirstFileW which returns a WIN32_FIND_DATAW structure, which includes a FILETIME member for each of creation, last access, and last write times.
    • Pass each of those timestamps to a function that:
      • Calls FileTimeToLocalFileTime to convert it to local time
      • Calls FileTimeToSystemTime to convert it to a SYSTEMTIME structure
      • Passes each member of the SYSTEMTIME structure as arguments to another function, which raises an INVALID_PARAMETER exception (0xC000000D) if the Year argument is not between 1970 and 3000, inclusive

When Docker, using its union filesystem, starts the container, the file access times are zero, which is midnight, 1970-01-01. When this date is converted to local time (in EST timezone, which is UTC-5), the timestamp is five hours before midnight, 1970-01-01, which puts the year at 1969. This caused an exception to be raised whenever NMAKE would run.

The solution was quite simple: Removing /etc/localtime made the system use UTC time, which avoids the problem.

(When I find my notes, I will explain how I leveraged WINE's debugging facilities to track down this very elusive problem.

Wednesday, April 13, 2016

Fun experiences using Wine in Docker

Background

I sometimes work with a legacy codebase that targets both Windows and Linux; the build system is GNU Make-based, and builds on Linux. For the Windows components, the build system invokes NMAKE, using Wine. Yes, it's messy; yes I want to replace it; but no there's no time budgeted right now.

Lately, I've been moving more and more of our build infrastructure to Docker. It makes keeping the build environments up-to-date for developers easier, and simplifies the setup for Continuous Integration. Check out my tool, Scuba for using Docker to perform local builds, and GitLab CI.

You can see where this is going. I decided to convert our legacy build VM into a Docker image; Wine and NMAKE included. I didn't know what I was getting myself into.

VM to Docker Image

Of course, the right way to create a Docker image is to use a Dockerfile. However, this current VM had experienced years of tweaks, potentially relying on subtle toolchain-version-specific quirks. I wasn't about to re-build it from scratch, so I decided to convert the VM filesystem directly to a Docker image.

The initial conversion turned out to be straightforward. First, I cloned the VM, so I could work destructively. Next, I uninstalled everything that wasn't necessary for a Docker image (including KDE, X11, firewall, etc.) Then, I powered down the cloned VM, and mounted its virtual disk under another VM, running Docker. From there, it's as simple as using Tar to create the Docker image:

# cd /mnt/buildvm; tar -c * | docker import --change='CMD /bin/bash' - buildsys:1

This adds all of the directories from the mounted build VM disk, and creates a tar stream which is piped into docker import - (where - means standard input). Note that I'm also setting the `CMD` to be `/bin/bash`; this way, the image can be run by simply using docker run -it buildsys:1, without having to specify /bin/bash every run.

After the initial conversion was done and I no longer needed to "boot" in the conventional way, I continued to run the image, removing more stuff, like:

  • rpm -e --nodeps kernel-xxx (You don't need a kernel when running under Docker, but don't want to remove other things that "depend" on it.)
  • yum remove dracut grub plymouth
  • yum clean all && rm -rf /var/cache/yum
  • rm -rf /var/log/* /tmp/*
I definitely had to be careful not to remove things that Wine unexpectedly relied upon. As I did this, I occasionally ran the image through a docker export / docker import cycle to actually reduce the virtual size of the image.

Wine without X11

The first time I tried to run wine in a Docker container, I was met with the following warnings/errors:

Application tried to create a window, but no driver could be loaded.
Make sure that your X server is running and that $DISPLAY is set correctly.
Googling for the error yielded some results from some other guys crazy enough to try using Wine in Docker also, like this SuperUser post and this GitHub project. It seemed that I would need some sort of X server after all, and that Xvfb (X Virtual FrameBuffer) was the solution.

You can simply run xvfb-run wine whatever.exe, and this will avoid the "no $DISPLAY" problems. Great. However, I didn't want to change any of our code to have to run under Docker. Specifically, I didn't want to track down every invocation of wine and prefix it with xvfb-run; what if we are running on native X?

Instead, I came up with what I believe is a novel solution: ENTRYPOINT. This essentially prefixes the user's command with whatever is specified in ENTRYPOINT - just what we want to do with xvfb-run. So the last time I re-imported the tarball, I added --change='ENTRYPOINT xvfb-run'. There's probably a way to do this after it's been imported, but this was the most convenient at the time.

Now, when I run docker run --rm -it buildsys:1 /bin/bash, I can verify that $DISPLAY is set, and Wine is happy. For now.

More to come...

Friday, November 20, 2015

Installing ESXi in a QEMU-KVM virtual machine, under libvirt / virt-manager

For a test setup, it may be useful to install VMware ESXi in a QEMU-KVM guest. If, like me, you're using libvirt (using virt-manager) to manage your VMs, here's some information to get this set up. I'm using Fedora 22, and ESXi 5.5.0.

There are other posts explaining how to set this up, but I wanted to share my experience, which is specific to virt-manager, and the newer QEMU.

Here's a step-by-step procedure for getting this working.


Add required KVM kernel module parameters:

  1. Edit (or create) /etc/modprobe.d/kvm-intel.conf to look like this:
    options kvm ignore_msrs=1
    options kvm-intel nested=y ept=y
    
  2. Remove the KVM module and re-load it with the new parameters:
    # modprobe -r kvm-intel kvm; modprobe kvm kvm-intel

Setup ESXi VM guest configuration:

  1. Create your ESXi VM using virt-manager.
  2. Change the NIC to vmxnet3. You'll have to manually type this in; it won't be in the drop-down.
  3. You'll need at least 2 GiB of RAM. (During install it actually came back with:
    <MEMORY_SIZE ERROR: This host has 2.00 GiB of RAM. 3.97 GiB are needed>
  4. Edit the config for this VM (named "esxi-test" here):
    # virsh -c 'qemu:///system' edit esxi-test
  5. Edit the first line of the XML file to be:
    <domain type='kvm' xmlns:qemu='http://libvirt.org/schemas/domain/qemu/1.0'>
  6. Change the CPU type:
    <cpu mode='host-passthrough'/>
  7. Add this block anywhere inside of <domain>...</domain>:
      <qemu:commandline>
        <qemu:arg value='-machine'/>
        <qemu:arg value='vmport=off'/>
      </qemu:commandline>
    
  8. Save and quit
Boot into the ESXi installer, and enjoy!

In dmesg, I see kvm spewing these messages, which probably have to do with ignroe_msrs:

kvm [3864]: vcpu0 ignored rdmsr: 0x34


ESXi 6.0.0 Notes:

I tried to use ESXi 6.0.0, but it didn't seem to find a network card, even though I specified vmnet3. These notes apply to 6.0.0:

  • Note that the installer appears to hang at "user loaded successfully." for about 110 seconds. "Running nfcd start" also takes a while. I have no idea why.

Resources

Thursday, July 9, 2015

Tools

Every geek has his/her favorite set of tools for accomplishing various tasks. Here are mine.

I tend to split my time between Linux and Windows so where possible there will be solutions for both. Preference is of course given to cross-platform FOSS projects.

This will be updated as I run across new tools or inventory the ones I use.

Wednesday, January 28, 2015

"Installing" Zotero

I've been playing with a new research tool called Zotero, which helps you keep track of research papers, etc. as you come across them.

I'm using their standalone version, which Chrome can push to via an extension. So far it seems really nice.

Zotero doesn't come with an installer on Linux, and I wanted to put it somewhere more permanent than my Downloads directory. So I did the following which makes Zotero feel very at home on my Centos 7 machine.

  1. Download the Linux tar.bz2 file
  2. Switch to root, and move the tar.bz2 file to /opt and extract it. Then rename the output directory:
    $ sudo su -
    # mv Zotero-4.0.25.2_linux-x86_64.tar.bz2 /opt
    # cd /opt
    # tar xf Zotero-4.0.25.2_linux-x86_64.tar.bz2
    # rm Zotero-4.0.25.2_linux-x86_64.tar.bz2
    # mv Zotero_linux-x86_64 zotero
    
  3. Retrieve the Zotero icon and add it to the icons/ directory:
    # wget -O zotero/icons/zotero-new-z-48px.png https://raw.githubusercontent.com/zotero/zotero/4.0/chrome/skin/default/zotero/zotero-new-z-48px.png
  4. Now as your user, create the desktop shortcut, using this .desktop file I put together:
    # exit
    $ wget -O ~/.local/share/applications/zotero.desktop http://goo.gl/BAJhYu
    
Note that the standalone version of Zotero keeps its local data in ~/.zotero. That's it! Enjoy!

Sunday, January 25, 2015

Installing rdesktop on Centos 7

I'll briefly summarize this blog post on installing rdesktop on Centos 7.

First, we'll set up the RPM build environment (as your local user):

$ sudo yum install rpm-build make gcc
$ mkdir -p ~/rpmbuild/{BUILD,RPMS,SOURCES,SPECS,SRPMS}
$ echo '%_topdir %(echo $HOME)/rpmbuild' > ~/.rpmmacros

Now, fetch and install the source package:

$ wget http://pkgs.repoforge.org/rdesktop/rdesktop-1.8.2-0.1.rfx.src.rpm
$ rpm -i rdesktop-1.8.2-0.1.rfx.src.rpm

Install devel dependencies and build:

$ sudo yum install openssl-devel libXt-devel libsamplerate-devel pcsc-lite-devel
$ rpmbuild -ba ~/rpmbuild/SPECS/rdesktop.spec 
$ sudo yum localinstall ~rpmbuild/RPMS/x86_64/rdesktop-1.8.2-0.1.el7.centos.x86_64.rpm

Saturday, January 24, 2015

Connecting to a Cisco ASA VPN with DoD CAC on CentOS 7

Update: I've created scripts to automate much of this process. You can find them on GitHub.


I often need to connect to a VPN with a Cisco ASA box at the head-end, using a DoD CAC (smart card) for authentication.

On Windows, this is often accomplished using Cisco's AnyConnect VPN client software. On Linux however, that option would never work for me. I tried to download it from the VPN https site, but it wouldn't load.

On Linux, we have an open-source alternative, called openconnect. The difficult part is getting it to use our smart card, and present the correct certificate to the VPN.

I found the following pages very useful in trying to get this all to work:

openconnect uses p11-kit to interact with PKCS #11 modules. (PKCS #11 is the standard for interfacing with cryptographic tokens, like smart cards.) The first thing we need to do is tell p11-kit to use the libcoolkey pkcs11 module. Do this by creating a new file named /etc/pkcs11/modules/libcoolkey.module, and adding the following line to it:

module:/usr/lib64/pkcs11/libcoolkeypk11.so

Next, we'll use p11tool --list-tokens to list all of the tokens on our system. You should see your smart card in this list. Mine showed up like this (along with others):

$ p11tool --list-tokens
...
Token 6:
 URL: pkcs11:model=;manufacturer=;serial=;token=REINHART.JONATHON.RICHARD.xxxxxxxx
 Label: REINHART.JONATHON.RICHARD.xxxxxxxx
 Manufacturer: 
 Model: 
 Serial:

Now, we want to look at all of the certificates available on our smart card. We'll use p11tool --list-all-certs [url], where [url] is the URL of our smart card token from the previous step:

$ p11tool --list-all-certs pkcs11:model=;manufacturer=;serial=;token=REINHART.JONATHON.RICHARD.xxxx
Object 0:
 URL: pkcs11:model=;manufacturer=;serial=;token=REINHART.JONATHON.RICHARD.xxxxxx;id=%01;object=CAC%20ID%20Certificate;object-type=cert
 Type: X.509 Certificate
 Label: CAC ID Certificate
 ID: 00:01

Object 1:
 URL: pkcs11:model=;manufacturer=;serial=;token=REINHART.JONATHON.RICHARD.xxxxxx;id=%02;object=CAC%20Email%20Signature%20Certificate;object-type=cert
 Type: X.509 Certificate
 Label: CAC Email Signature Certificate
 ID: 00:02

Object 2:
 URL: pkcs11:model=;manufacturer=;serial=;token=REINHART.JONATHON.RICHARD.xxxxxx;id=%03;object=CAC%20Email%20Encryption%20Certificate;object-type=cert
 Type: X.509 Certificate
 Label: CAC Email Encryption Certificate
 ID: 00:03
So we can see the three certificates available on our smart card.

The Windows AnyConnect software will pop-up a dialog asking you to select the certificate for authentication when the server asks for a client certificate. openconnect currently has no such functionality, so we need to explicitly tell openconnect which certificate to use. In my case, I already knew it was the certificate with ID: 00:02, the "CAC Email Signature Certificate". So I pass the -c option, with the minimal URL to unambiguously refer to that certificate:

$ sudo openconnect -c 'pkcs11:token=REINHART.JONATHON.RICHARD.xxxxxx;id=%02' vpn.example.com

Note that I had to use sudo because openconnect will invoke some scripts to set up the tun device and routing.

At this point, openconnect should ask for your PIN, and then successfully connect to the VPN! If not, you may need to try the other certificates, by changing the id= part of the certificate URL.

Finally, there are still a few outstanding warnings that occur during this process:

  • Certificate from VPN server "vpn.example.com" failed verification. Reason: signer not found - I need to determine which certificate this is exactly, and how to add it to my trusted certificate store.

Note: I've had to install various packages and make various changes in playing with my smart card, so if something isn't working for you, or I've skipped a step, please leave a comment so I can make this post more accurate. Thanks!

Update: Additional steps - I'll work these in above at some point:

  • yum install coolkey
  • service pcscd start (on Fedora 21)

Adding storage to Proxmox VE

The 1 TB drives for my HP server came today. Scott at All Computer Parts was very helpful and quick to reply. I quickly went to hot-plugging them into my server running Proxmox VE.

After the drives spun-up, I logged into the HP System Management Homepage (download) and opened the HP Array Configuration Utility. From there, I selected 3 of the unassigned drives and created an array. I then crated a RAID 5 logical drive using all of the space available on the array (1.8 TB). Finally, I added the remaining drive as a hot-spare, by selecting the array, and clicking "Spare Management". This way, if one drive goes offline, the hot-spare will immediate take its place, and the array will be rebuilt.

The logical disk is immediately detected by the Linux kernel, evidenced by /var/log/messages:

Jan 23 22:38:40 dragster kernel: hpsa 0000:04:00.0: Direct-Access     device c0b0t0l1 added.
Jan 23 22:38:40 dragster kernel: scsi 0:0:0:1: Direct-Access     HP       LOGICAL VOLUME   6.40 PQ: 0 ANSI: 5
Jan 23 22:38:40 dragster kernel: sd 0:0:0:1: Attached scsi generic sg3 type 0
Jan 23 22:38:40 dragster kernel: sd 0:0:0:1: [sdb] 3906918832 512-byte logical blocks: (2.00 TB/1.81 TiB)
Jan 23 22:38:40 dragster kernel: sd 0:0:0:1: [sdb] Write Protect is off
Jan 23 22:38:40 dragster kernel: sd 0:0:0:1: [sdb] Write cache: disabled, read cache: enabled, doesn't support DPO or FUA
Jan 23 22:38:40 dragster kernel: sdb: unknown partition table
Jan 23 22:38:40 dragster kernel: sd 0:0:0:1: [sdb] Attached SCSI disk

Proxmox works well with LVM. It actually works directly with LVM volume groups, creating logical volumes on-the-fly for new VMs, etc. You can find detailed information on the Proxmox wiki, but the procedure was quite simple:

  1. Create the LVM physical volume on the physical disk: (In this case, the "physical disk" was a RAID logical disk)
    # pvcreate /dev/sdb
    Physical volume "/dev/sdb" successfully created

    Note that I created the physical volume directly on the block device, without partitioning the drive. LVM does not require a partition table, and I'm not booting to the disk, so there was no need.
  2. Create a LVM volume group from that single physical volume:
    # vgcreate raid5vg /dev/sdb
      Volume group "raid5vg" successfully created

And we're ready to go! List the LVM volume groups with the vgs command:

# vgs
  VG      #PV #LV #SN Attr   VSize  VFree
  pve       1   3   0 wz--n- 67.83g 8.50g
  raid5vg   1   1   0 wz--n-  1.82t 1.80t

Now it's time to tell Proxmox about the new storage. Log into the Proxmox web UI, and select the "Datacenter" node in the tree. On the Storage tab, select Add > LVM. On that dialog, we select the new volume group and given it a name (I made it the same as the vg).

And your storage is made available to Proxmox!

I went ahead and moved the couple VMs I had from the old main storage to the new array. You can do this by highlighting the Hard Disk on the VM's Hardware tab, and clicking "Move disk".

Saturday, January 10, 2015

Add Suspend and Hibernate to GNOME 3 shell status menu in CentOS 7

I spent days searching for the Suspend option in my new CentOS 7 installation.

Well, I finally found it, but it wasn't as easy as you'd expect.


First you need to install the gnome-shell-extension-alternative-status-menu extension, as well as gnome-tweak-tool:

    $ sudo yum install gnome-shell-extension-alternative-status-menu gnome-tweak-tool

Next, log-out and log back in.

Then, use gnome-tweak-tool to enable the fancy new extension:

And there you have it; a menu that Windows has had by default for a decade.

Saturday, January 3, 2015

Dual Booting with GRUB2 (CentOS 7) and Windows 7

TL;DR:You need to install the ntfs-3g package, in order for os-prober to detect Windows installations. This allows grub2-mkconfig to automatically generate an entry for dual-booting into Windows.


Doing a lot more hardware hacking these days, I've felt constrained running Linux in a VM all the time. I was especially disappointed that VirtualBox doesn't expose nested Intel VT-x features to its guests. So I've decided to try dual-booting again, going with the very stable CentOS 7.

Not willing to sacrifice any space on my Windows SSD, I put another Crucial SSD in my machine - this time the 256 GB version of their newer MX100 series. Downloading the NetInstall ISO and pointing at a relatively close mirror gave a very satisfying install experience. Having the whole drive made things quite easy as well - except for the actual Dual-Booting part.

I wasn't terribly surprised that the setup process didn't automatically add a GRUB 2 entry for booting to my Windows 7 drive. Everything I read indicated that simply running grub2-mkconfig should set up the GRUB config script to include Windows. Yet, it wasn't working for me. Supposedly GRUB 2 uses os-prober to automatically detect other OSes and generate boot entries for them. However, running os-prober showed no Windows install, even though my drive was clearly visible.

After stumbling across this post on LinuxQustions.org, it turns out that the NTFS-3g package (for mounting NTFS volumes) isn't installed by default, and os-prober needs this the mount the drive and detect the installed OS. After installing ntfs-3g (from the EPEL repository), I was able to run grub2-mkconfig -o /boot/grub2/grub.cfg and successfully add an entry for Windows 7.

Tuesday, December 30, 2014

Installing Nemiver on Centos 7

I recently heard about Nemiver, a standalone C/C++ debugger for GNOME, and wanted to give it a try.

My current Linux development box is running CentOS 7. While Nemiver packages exist for CentOS 6, the same cannot be said for CentOS 7. So I proceeded to build it from source.

First, I went ahead and cloned the Git repository: git clone git://git.gnome.org/nemiver

After running the ./autogen.sh script, it was clear that I was in for several iterations of dependency installation. I'll save you the trouble:

sudo yum install gnome-common intltool yelp-devel yelp-tools boost-devel sqlite-devel GConf2-devel libgtop2-devel glibmm24-devel gtkmm30-devel gtk3-devel gtksourceview3-devel vte3 vte3-devel

Note that I do have the EPEL repository enabled, so I'm not sure if some of those packages came from EPEL or not.

Unfortunately, there seems to be no gtksourceviewmm-3.0 package for CentOS 7 either! Sure, why not install that one from source, too?

First, download gtksourceviewmm-3.2.0.tar.xz (or later). By default, configure defaults to PREFIX=/usr/local. If you don't change this, pkg-config won't know where do find it. So ./configure --prefix=/usr --libdir=/usr/lib64 seems to be what we want. Then make, sudo make install as usual.

Now, you should be able to finish configuring and making Nemiver!

Note that there also seemed to be a build issue in src/confmgr/nmv-gconf-mgr.cc. The following patch took care of it for me - not sure how this went unnoticed.

--- a/src/confmgr/nmv-gconf-mgr.cc
+++ b/src/confmgr/nmv-gconf-mgr.cc
@@ -32,6 +32,7 @@
 NEMIVER_BEGIN_NAMESPACE (nemiver)
 
 using nemiver::common::GCharSafePtr;
+using nemiver::common::GErrorSafePtr;
 
 class GConfMgr : public IConfMgr {
     GConfMgr (const GConfMgr &);

Until this is fixed, you can use my fork at git@github.com:JonathonReinhart/nemiver.git

Thursday, October 23, 2014

GitLab time zone issues

GitLab is a great open source GitHub clone, which I've started using for tracking my personal Git repos.

One frustrating thing I've found with GitLab however, is its handling of time zones.

Read:

Apparently GitLab doesn't detect the user's timezone (or store it in their profile) and display times accordingly.  Everything outside of the Git timestamps appears to be tracked in UTC.

To fix this for my local server, I edited
    /opt/gitlab/embedded/service/gitlab-rails/config/application.rb
and specified
    config.time_zone = 'Eastern Time (US & Canada)'

Update:

In version 7.5.0, this configuration option was moved to gitlab.yml. Now you don't have to re-set this option after every upgrade. Instructions for how to set it for an Omnibus install (in /etc/gitlab/gitlab.rb) are here.

Wednesday, May 28, 2014

TrueCrypt-end

Today, the TrueCrypt website and SourceForge project page suddenly changed, indicating the end of TrueCrypt development. truecrypt.org now redirects to their SourceForge project page, and the content has been replaced with a surprising message:


Not only has development officially ceased, but TrueCrypt is being declared "not secure", and the official webpage is suggesting that people migrate to BitLocker!  (BitLocker is the drive encryption solution built in to some versions of Windows Vista and later.)  Furthermore, a new version 7.2 had been released, which warns users that TrueCrypt is insecure. The repository had been scrubbed, and all previous binaries had been deleted.

I'm sure you could almost hear the collective WTF?! from everyone in the InfoSec community.

A series of edits indicating that the software had been discontinued were even posted to the TrueCrypt Wikipedia page by a user with the handle Truecrypt-end.

At first, it seemed like some pranksters had managed to take over the TrueCrypt website, and poke fun by suggesting users migrate to their inferior commercial competitor, BitLocker.  Well, the DNS records had not changed, so everything was good there. And SourceForge indicated that there was no suspicious behavior on the account (ya know, aside from closing everything down!)

Of course there are rumors abound at all of the tech watering holes, from Slashdot to the /r/sysadmin subreddit  to the InfoSec Stack Exchange site and of course Twitter.  While many still believe that the project was hacked, others are pondering the possibility that the devs were asked to insert a back-door, and subject to a gag-order preventing them from disclosing the requirement.  The TrueCrypt development team has remained behind the big black curtain for most of its development which makes the situation even more curious. Perhaps a vulnerability had been discovered and the developers simply didn't want to be involved with the product any more. There is certainly no shortage of opinions on the matter. The most interesting theory I've heard is that this is a sort of warrant canary.


So what about this new version 7.2?

The binaries were signed with the same GPG key as all previous releases, indicating that this release was "official", or at least produced by someone with access to the private key.

Internally, the TrueCrypt.exe executable and the truecrypt(-x64).sys drivers were signed (a la Microsoft Authenticode) with a different certificate than 7.1.1, but that certificate expired shortly after the last release. This new certificate was issued (to the same named entity) shortly before the previous certificate expired. It's very unlikely that someone was able to spoof a new certificate in this manner, and had planned it two years ago.  [Screenshots tomorrow.]

The changes to the latest version's source code were posted to GitHub.  This paints probably the most confusing picture of all.  

First, the code has been littered with warning messages and error codes indicating that "Using TrueCrypt is not secure".  Next, we see that pretty much all of the code related to creating encrypted volumes has been removed, and replaced with AbortProcess ("INSECURE_APP");. We also notice that all code related to updates, error reporting, user's guide/help, or anything pointing back to the TrueCrypt website has been removed.  Clearly, the developers consciously made the decision to burn all bridges, and carefully executed a plan to do so.

What's very bizarre however, is that while there were 4112 deletions, there were also 1760 additions to the code. Along with other minor bugfixes, it appears that in-place decryption was newly implemented.  It looks as if this was code that was part of an upcoming release that brought some improvements after a two-year break. Unfortunately, it also came with mass deletions that rendered the software useless for anyone seeking to create encrypted content.

What are you thoughts?


Thursday, March 7, 2013

Gotta catch 'em all: Last-chance exception handling in .NET with WinForms

Recently, I went through the exercise of hooking up a crash-reporting component to a large .NET application using Windows Forms.  The goal, of course, is to catch all unhandled exceptions so they can be reported to the developer.

Throughout this post I'll be referring to this Program.cs. The code we incrementally un-commented for each of the examples. I'll also link to compiled example executables. If you don't trust my binaries, you can compile them yourself.


0.  No exception handling

First we see an application that throws exceptions in the UI thread and a background thread, with no handling. Try out 0_Nothing.exe.
With no exception handling, background thread exceptions crash hard. UI thread exceptions are handled by the built-in .NET WinForms handler:


This has a Continue option which allows the user to ignore the exception and go on. This method is absolutely unacceptable. No exceptions should ever be allowed to be ignored, as the program is in an indeterminate state.


1.  try / catch

The naive approach would be to set up a try/catch block in Main() around the Application.Run() call. See 1_TryCatch.exe.
try {
   Application.Run(new Form1());
}
catch (Exception ex) {
   // ...
}
We see here that there is no difference between this and the version with no try/catch. This is because the UI thread exceptions are still being handled inside of Application.Run() by the default handler. The try/catch is never used, and background thread exceptions are unaffected.


2.  Application.ThreadException

Next, we utilize WinForms' Application.ThreadException event to handle UI thread exceptions. See 2_Application_ThreadException.exe.
Application.ThreadException += (sender, args) =>
   HandleException("Application.ThreadException", args.Exception);
Here, we see that instead of the unacceptable WinForms handler, our handler was called (for UI thread exceptions). However, as MSDN points out (emphasis mine):
This event allows your Windows Forms application to handle otherwise unhandled exceptions that occur in Windows Forms threads.
...
To catch exceptions that occur in threads not created and owned by Windows Forms, use the UnhandledException event handler.
So background thread exceptions still crash hard in this example.


3.  AppDomain.UnhandledException

Now we follow the documentation and hook up the AppDomain.UnhandledException handler. See 3_AppDomain_UnhandledException_NoUhandledMode.exe.
AppDomain.CurrentDomain.UnhandledException += (sender, args) =>
   HandleException("AppDomain.UnhandledException", (Exception)args.ExceptionObject);
Now finally, we are able to catch exceptions on background threads with this handler. UI thread exceptions, however, are still handled by our Application.ThreadException handler.


4.  Application.SetUnhandledExceptionMode

As mentioned in the MSDN documentation, a call to Application.SetUnhandledExceptionMode and passing UnhandledExceptionMode.ThrowException tells Winforms to not use the Application.ThreadException handler. Instead, it lets exceptions bubble out of Application.Run. See this in 4_Everything.exe.
Application.SetUnhandledExceptionMode(UnhandledExceptionMode.ThrowException);
The result is that the try/catch around Application.Run actually works now: UI thread exceptions are now caught by that handler.


5.  No more try / catch

Finally, removing the try/catch around Application.Run allows for all unhandled exceptions to be handled via AppDomain.UnhandledException. See 5_Final.exe. This is how we ended up handling everything in our application; we found it ideal to have one route for all[1] unhandled exceptions.


Summary

It is important to note that all exceptions are handled on the thread that they occurred on. If you're in the same boat I was in, you're stuck with a third-party crash handler component that had to be run on the UI thread. Because of this, I marshal the calls to the UI thread with a call to Control.Invoke(), as usual for cross-thread UI stuff.

[1] - In fact it gets even more complicated. There are certain scenarios where exceptions that need to cross Kernel or COM boundaries can be swallowed. For example, the Form.OnLoad method is actually a user-mode kernel callback. These are notorious for swallowing exceptions. In cases where we are sufficiently suspect of exceptions, we set up a try/catch and manually hand off the exception to the common handler.

The full source code for my example binaries can be downloaded here.

Monday, February 25, 2013

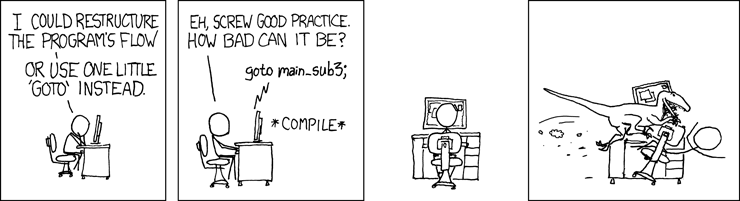
goto: The Forbidden Fruit


Nowdays, it's not hard to find tons of arguments against the use of goto in C (and C-like languages).  Post anything to StackOverflow, about/including goto and you're almost guaranteed to get flamed.


Just like many good and useful things in our lives (pocketknives, guns, kegs, etc.) it only takes a few people to abuse something before everyone else categorizes it as "bad".  But the truth is, goto is a simple tool that, when used correctly, can make a program much easier to write (and even understand!)

First, let's take a look at how *not* to use goto (this is just a little example, nothing meaningful):

int foo(int a)
{

   int bar;
   while (bar < spam())
   {
loop:
      bar = a * scale;
      if (bar > 100) goto toobig;
      bla(bar);
   }
   return bar;
toobig:
   if (bar-tar > 0)
      return bar;
   bar -= 5; goto loop;


   return bar * 2;
}


Wow, that was even hard to come up with, and cetrainly isn't the way to do things. Jumping in and out of control structures is bound to confuse the next guy, and possibly the compiler when it is trying to optimize.

But in the right places, goto can be extremely useful. Luckily, my opinion here is not alone. In fact, the Linux Kernel (3.8) uses goto over 100,000 times!
$ find linux-3.8 -iname '*.c' -exec grep 'goto' {} \; | wc -l
104299
Here is a good example of this programming style in use, from the ext4 driver.


First, let's look at some bad code. The author does two things that I really dislike: 1) They return all over the place. This is okay, unless (like in this example) you have to deal with resource de-allocation. Here, this leads to a fragile situation with lots of calls to free. 2) They check first for success, which leads to ridiculous amounts of nesting.
bool baz() {
   bool result = false;
   uint8_t *buf1 = NULL;
   uint8_t *buf2 = NULL;
   uint8_t *buf3 = NULL;

   // Allocate buffers.
   buf1 = malloc(BUF1_SIZE);
   if (buf1) {

      buf2 = malloc(BUF2_SIZE);
      if (buf2) {

         buf3 = malloc(BUF3_SIZE);
         if (buf3) {

            result = use_buffers(buf1, buf2, buf3);
            if (result)
               printf("Success!\n");
            else
               fprintf(stderr, "Operation failed.\n");
            free(buf3);
            free(buf2);
            free(buf1);
            return result;

         }
         else {
            fprintf(stderr, "Error allocating %d bytes.\n", BUF3_SIZE);
            free(buf2);
            free(buf1);
            return false;
         }
      }
      else {
         fprintf(stderr, "Error allocating %d bytes.\n", BUF2_SIZE);
         free(buf1);
         return false;
      }
   }
   else {
      fprintf(stderr, "Error allocating %d bytes.\n", BUF1_SIZE);
      return false;
   }
}


Using goto and a single exit point clean this mess up very nicely:
bool baz() {
   bool result = false;    // Assume failure until proven successful
   uint8_t *buf1 = NULL;
   uint8_t *buf2 = NULL;
   uint8_t *buf3 = NULL;

   // Allocate buffers.
   buf1 = malloc(BUF1_SIZE);
   if (!buf1) {
      fprintf(stderr, "Error allocating %d bytes.\n", BUF1_SIZE);
      goto exit;
   }

   buf2 = malloc(BUF2_SIZE);
   if (!buf2) {
      fprintf(stderr, "Error allocating %d bytes.\n", BUF2_SIZE);
      goto exit;
   }

   buf3 = malloc(BUF3_SIZE);
   if (!buf3) {
      fprintf(stderr, "Error allocating %d bytes.\n", BUF3_SIZE);
      goto exit;
   }

   // Do something useful
   if (!use_buffers(buf1, buf2, buf3)) {
      fprintf(stderr, "Operation failed.\n");
      goto exit;
   }

   result = true;
   printf("Success!\n");

exit:
   if (buf1) free(buf1);
   if (buf2) free(buf2);
   if (buf3) free(buf3);

   return result;
}

This allows for a very straight-forward approach to handling resource allocation/freeing and a clean exit path. It's much easier to maintain as well (imagine having to remove buf2 in the first example!)

An alternative to goto I often see is the dummy do-while loop:
bool baz() {
   bool result = false;
   uint8_t *buf1 = NULL;
   uint8_t *buf2 = NULL;
   uint8_t *buf3 = NULL;

   do {
      // Allocate buffers.
      buf1 = malloc(BUF1_SIZE);
      if (!buf1) {
         fprintf(stderr, "Error allocating %d bytes.\n", BUF1_SIZE);
         break;
      }
   
      buf2 = malloc(BUF2_SIZE);
      if (!buf2) {
         fprintf(stderr, "Error allocating %d bytes.\n", BUF2_SIZE);
         break;
      }
   
      buf3 = malloc(BUF3_SIZE);
      if (!buf3) {
         fprintf(stderr, "Error allocating %d bytes.\n", BUF3_SIZE);
         break;
      }
   
      // Do something useful
      if (!use_buffers(buf1, buf2, buf3)) {
         fprintf(stderr, "Operation failed.\n");
         break;
      }
   
      result = true;
      printf("Success!\n");
   } while(0);

   if (buf1) free(buf1);
   if (buf2) free(buf2);
   if (buf3) free(buf3);

   return result;
}

This isn't terrible, but what about when you want to use an actual loop inside that dummy do-while, and break out of it? PHP includes a nice disgusting feature to break out of multiple levels. In other languages you're screwed, unless you follow the loop with some additional code to check for completion of the loop:

bool baz() {
   bool result = false;
   uint8_t *buf1 = NULL;
   uint8_t *buf2 = NULL;
   int i;

   do {
      // Allocate buffers.
      buf1 = malloc(BUF1_SIZE);
      if (!buf1) {
         fprintf(stderr, "Error allocating %d bytes.\n", BUF1_SIZE);
         break;
      }
   
      buf2 = malloc(BUF2_SIZE);
      if (!buf2) {
         fprintf(stderr, "Error allocating %d bytes.\n", BUF2_SIZE);
         break;
      }
   
      // Do something in a loop
      for (i=0; i<CONSTANT; ++i) {
         if (!use_buffers(buf1, buf2)) {
            fprintf(stderr, "Operation #%d failed.\n", i);
            break;            // Can't get out of the do-while from here!
         }
      }

      // Have to add this ridiculous check, because we could have exited
      // the loop early...
      if (i==CONSTANT) {
         result = true;
         printf("Success!\n");
      }
   } while(0);

   if (buf1) free(buf1);
   if (buf2) free(buf2);

   return result;
}
In this case, a goto exit; would have worked just fine.

Sunday, February 24, 2013

Deftones - You've Seen the Butcher - Timing


Maybe the name of this blog should include something about ADD or OCD. Either way, enough time was spent perfecting this, I figure I might as well share it with the Interwebs.

I'm a big fan of Deftones and their 2010 album Diamond Eyes was unsurprisingly awesome.  You've Seen the Butcher is an awesome track.  The timing is subtly complicated, so I decided to chart it out.  Hope this helps someone.

All time signatures are x/4, and the number of beats in each measure are shown.  For many parts of the song, the final measure's number of beats is the same as the part that follows. These are noted.

Intro
     lead-in                      1

Guitar-only               Alt. 3 and 4
     last measure                 5

Heavy riff (no vox)    Alt. 3 and 5
     last measure                 4


Verse 1
Verse                  Alt. 3 and 4
     last measure                 5

Pre-Chorus             Alt. 3 and 5

Chorus                 4
     last measure                 3


Verse 2
Verse                  Alt. 3 and 4
     last measure                 5

Pre-Chorus             Alt. 3 and 5

Chorus                 4


Bridge  note the two 6/4 measures

Heavy riff (no vox)    3  5  3  6  3  5  3  5
                     
Pre-Chorus             3  5  3  6  3  5  3  5


Outro
Chrous                 4
     last measure                 5

Ending                 3  (free)

Thursday, December 13, 2012

Named Pipes between C# and Python

There's a lot of over-complicated information on the internet for communicating between a C# process and a Python process using named pipes on Windows.  I'll start with the code:

C#
// Open the named pipe.
var server = new NamedPipeServerStream("NPtest");

Console.WriteLine("Waiting for connection...");
server.WaitForConnection();

Console.WriteLine("Connected.");
var br = new BinaryReader(server);
var bw = new BinaryWriter(server);

while (true) {
    try {
        var len = (int) br.ReadUInt32();            // Read string length
        var str = new string(br.ReadChars(len));    // Read string

        Console.WriteLine("Read: \"{0}\"", str);

        str = new string(str.Reverse().ToArray());  // Just for fun

        var buf = Encoding.ASCII.GetBytes(str);     // Get ASCII byte array     
        bw.Write((uint) buf.Length);                // Write string length
        bw.Write(buf);                              // Write string
        Console.WriteLine("Wrote: \"{0}\"", str);
    }
    catch (EndOfStreamException) {
        break;                    // When client disconnects
    }
}

Console.WriteLine("Client disconnected.");
server.Close();
server.Dispose();

Python
import time
import struct

f = open(r'\\.\pipe\NPtest', 'r+b', 0)
i = 1

while True:
    s = 'Message[{0}]'.format(i)
    i += 1
        
    f.write(struct.pack('I', len(s)) + s)   # Write str length and str
    f.seek(0)                               # EDIT: This is also necessary
    print 'Wrote:', s

    n = struct.unpack('I', f.read(4))[0]    # Read str length
    s = f.read(n)                           # Read str
    f.seek(0)                               # Important!!!
    print 'Read:', s

    time.sleep(2)
In this example, I implement a very simple protocol, where every "message" is a 4-byte integer (UInt32 in C#, 'I' (un)pack format in Python), which indicates the length of the string that follows. The string is ASCII. Important things to note here:
  • Python
    • The third parameter to open() means "unbuffered". Otherwise, it will default to line-buffered, which means it will wait for a newline character before actually sending it through the pipe.
    • I'm not sure why, but omitting the seek(0) will cause an IOError #0. I was clued to this by a StackOverflow question.
References:

Wednesday, November 14, 2012

Rename SVN Repository

It happens sometimes: You'd like to rename your SVN repository.  Well simply renaming the directory on the server won't do the trick.

Thanks to Miky Dinescu's post, we find that the best way to do this is use svnadmin dump and svnadmin load to export, and import the old repository into a new one, without losing anything.

I wrapped this process up in a nice, foolproof script. Hopefully it makes your life easier.